Contact Feature
What is the Contact Feature?
The Contact feature is how Swiftspeed turns the basic "where to find us" information for any business into a polished native mobile contact page, without writing a line of code. You fill in a single form (business name, email, phone, website, full address, optional Google Maps URL, and a description) and the editor wraps it in a native iOS and Android contact page that supports tap-to-call, tap-to-email, tap-to-website, and one-tap directions.
When users tap the phone number, the dialer opens with the number pre-filled. Tap the email and the email client opens with the address pre-filled. Tap "Get directions" and Google Maps or Apple Maps opens with a route from the user's current location. The Contact page is a small but high-converting feature, every time a customer reaches for the phone in the mobile app, the contact page is the path of least resistance.
Before You Start
A few things to have ready before you wire the contact page into the mobile app:
- Your business name as you want it displayed in the contact page header
- A valid email address (becomes a
mailto:link in the native app, so use a real inbox you actually monitor) - A phone number in international E.164 format (
+1 555 010 2345). The native dialer handles the formatting, you just need a parseable number. - Your website URL, full https://
- Your full mailing address (street, city, postcode, country)
- A Google Maps URL for one-tap directions. Easiest source: open Google Maps in a browser, search your business, click Share, copy the short link.
- Optional: a cover image (square or 16:9, 1200 pixels wide) shown at the top of the contact page
- Optional: a short description (the editor accepts up to ~500 characters of free text shown below the address)
Adding the Contact Feature to Your Mobile App
Inside the Swiftspeed editor, the contact page becomes a feature page in your native mobile app. The flow below walks through adding it:
From your Swiftspeed dashboard, click the edit pencil on the mobile app you want to add a contact page to.
You'll land in the App Editor. Click Features in the top bar, that's where every page in your native mobile app lives, including the Contact page you're about to add.

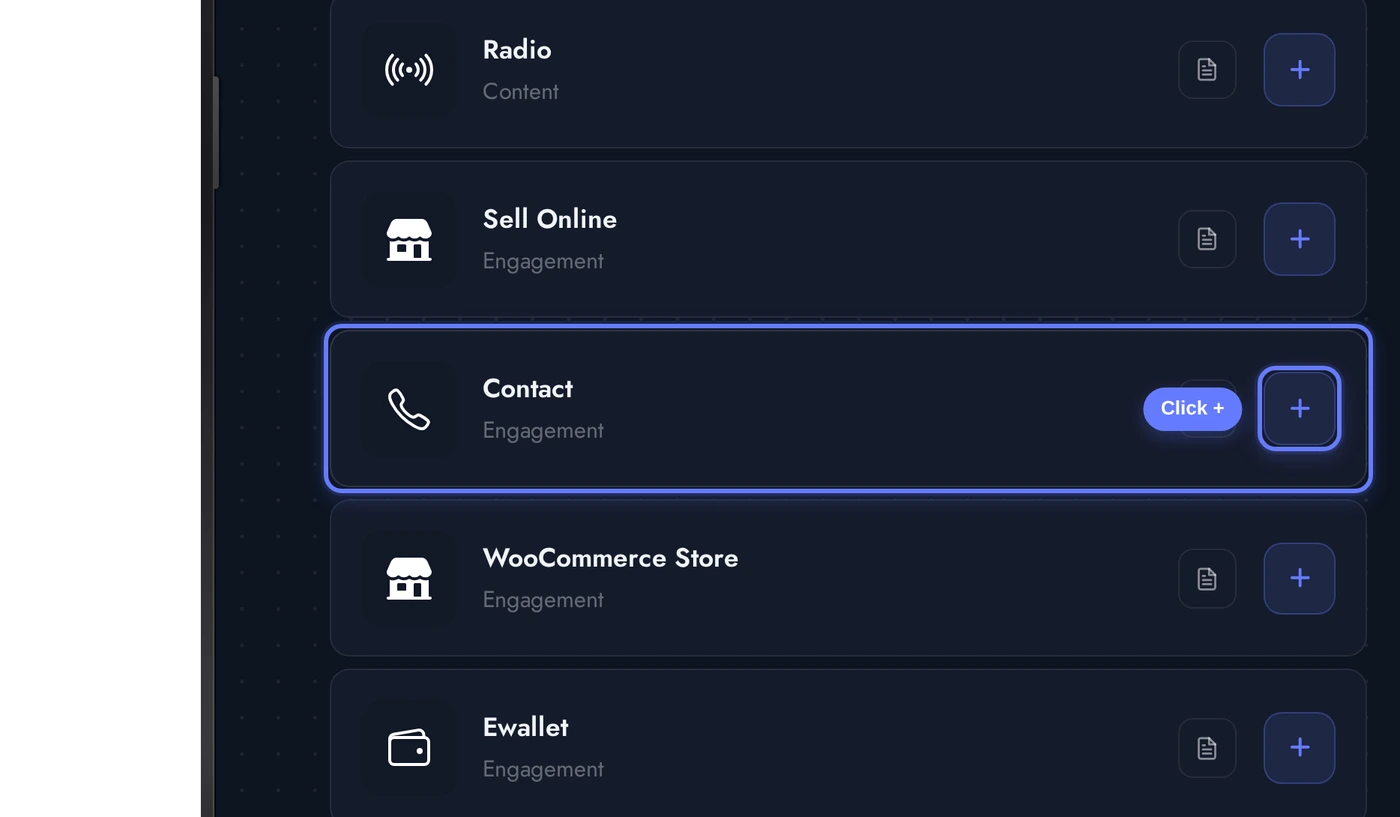
In the Add a Page list, find the Contact card and click the + button on its right. This adds the contact page to the rest of your mobile app.
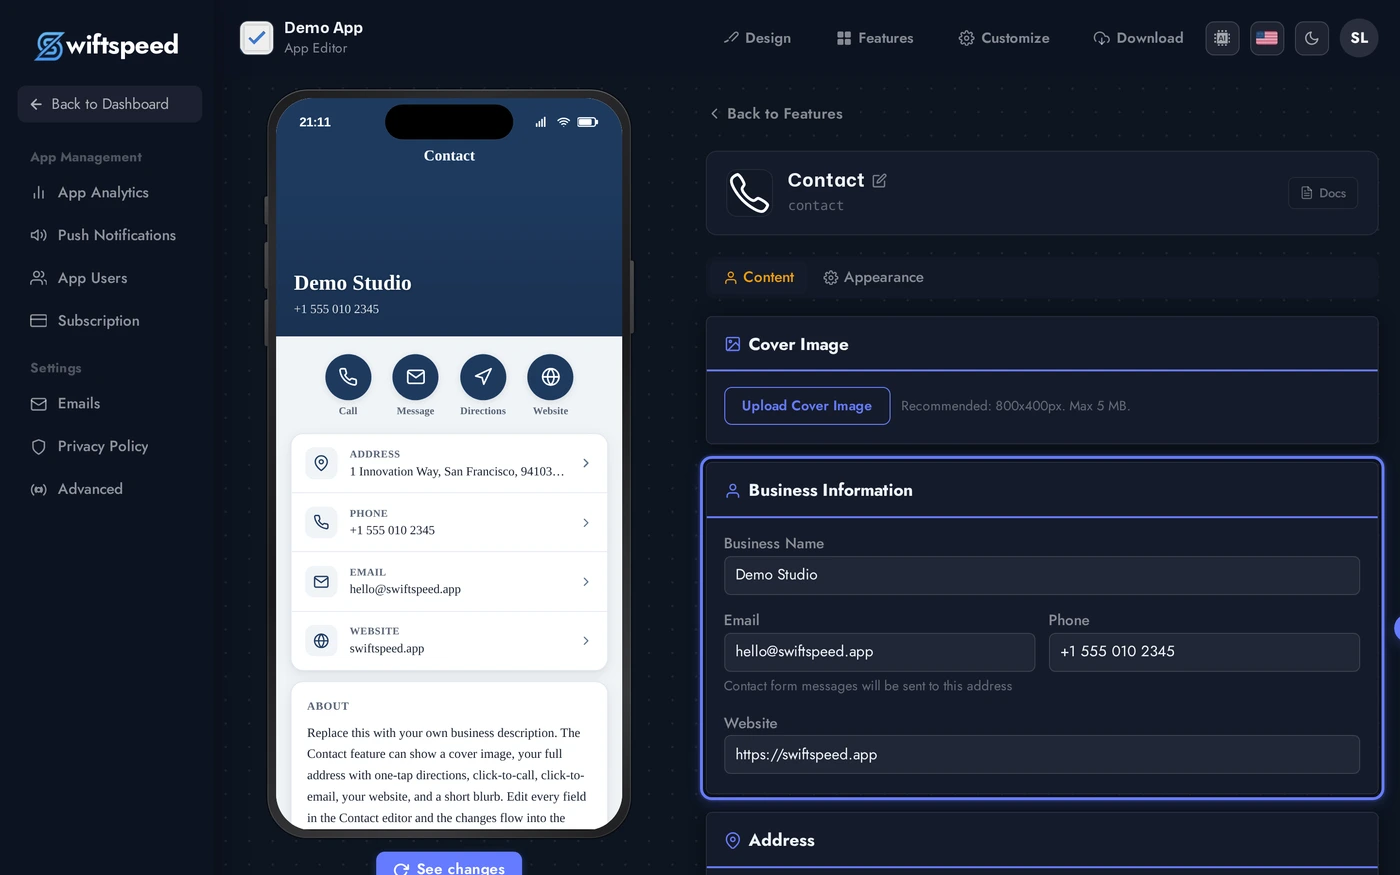
Demo Info Comes Pre-Loaded
The moment you add Contact, Swiftspeed seeds it with realistic demo info (business name, email, phone, full San Francisco address, Google Maps coordinates, and a short description) so the Content tab and phone preview never look blank. Replace one field at a time with your real business info, the editor autosaves on every change, and the native app picks the new content up immediately.
No demo data is ever published if you fill the fields out before generating an APK or IPA, the seed exists only so the editor and the in-builder phone preview look real during your first session.
The Content Tab
When the Contact editor opens, the Content tab is the default workspace. This is where every piece of business info lives. Four cards top-to-bottom:
Every field in the Content tab autosaves the moment you click out of it. Watch the small "saving" badge next to the tab nav, it appears for a fraction of a second after each change. There is no manual Save button, the autosave keeps the contact page in sync with the live editor preview.
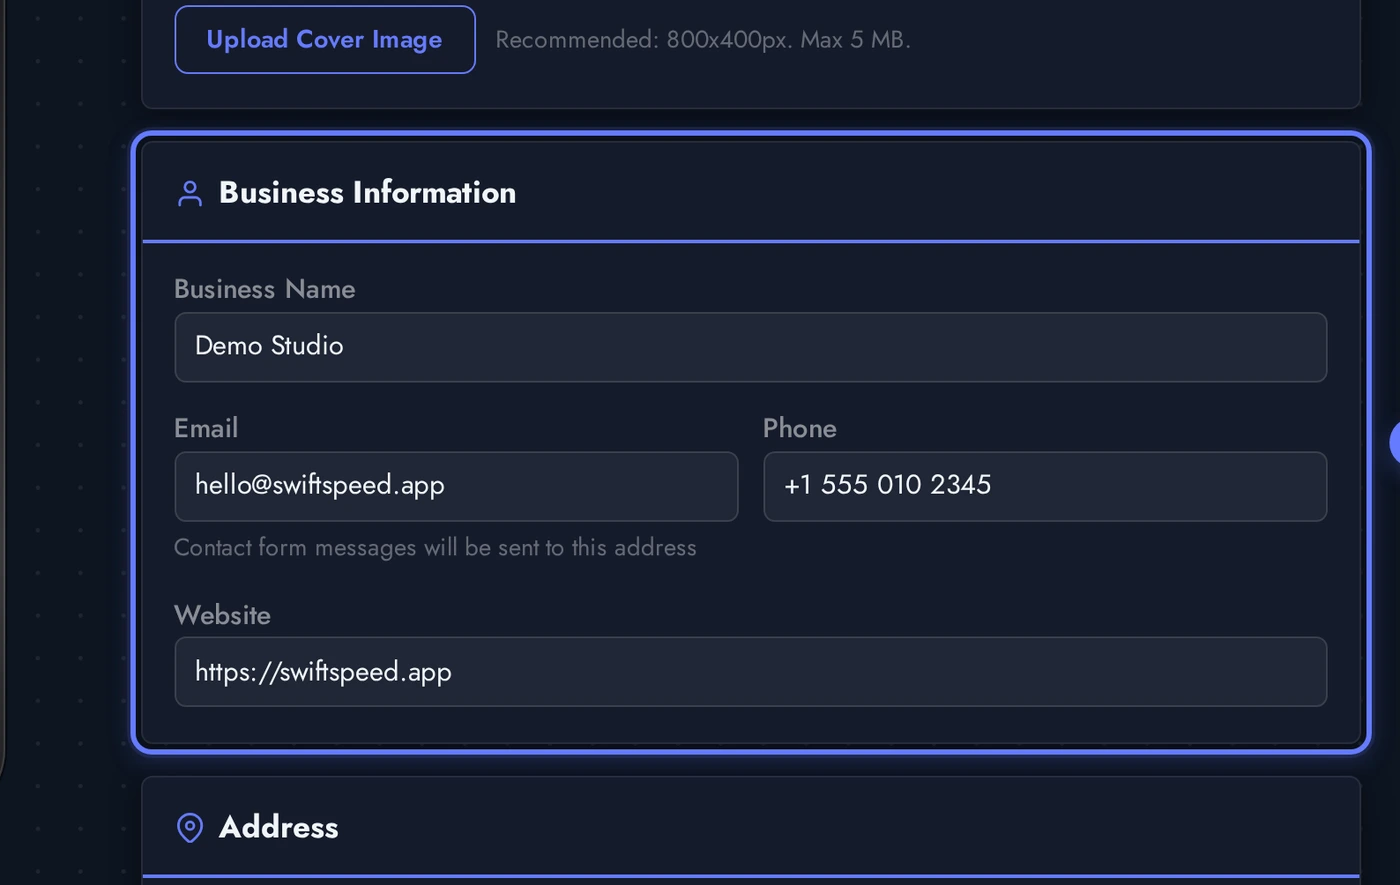
- Cover Image: optional. A square or 16:9 image (1200 pixels wide is plenty) shown at the top of the contact page in the native app. Upload a JPG/PNG, the editor converts and serves a CDN-friendly version.
- Business Info: business name, email, phone, website. Each one is the source of truth for one tap target on the native page.
- Address: street, city, postcode, country, and an optional Google Maps URL. If you supply the Maps URL, the Get Directions button on the native page opens that URL in Google or Apple Maps. If you leave it blank, the Directions button hides automatically (toggle at the bottom of the card lets you force-hide it even when a URL is set).
- Description: optional free-text blurb shown below the address. Up to ~500 characters, plain text only.
Address and One-Tap Directions
The Address card is what powers the most useful tap target on the contact page: Get Directions. The native app reads the Google Maps URL you save and opens it in the system maps app the moment a user taps. iOS opens Apple Maps by default, Android opens Google Maps, the URL is the same.
Paste the full Google Maps short link into Google Maps URL (open Google Maps in a browser, search your business, click Share, copy the link). The Show directions toggle below the form controls whether the Get Directions button is visible on the native contact page, leave it on for businesses that want walk-in visitors, turn it off for online-only businesses.
Designing the Contact Page (Themes and Custom Colors)
The Appearance tab controls how the contact page looks on the phone. Pick a theme for an instant complete look, then refine any individual color through the Custom Colors panel underneath.
Each theme card previews the look (background, surface, accent, text balance). Click any card to apply, the phone preview updates in place without a re-build. Most contact pages do well on Professional (clean white + brand accent) or Minimal (soft surface + dark text), but you have full control.
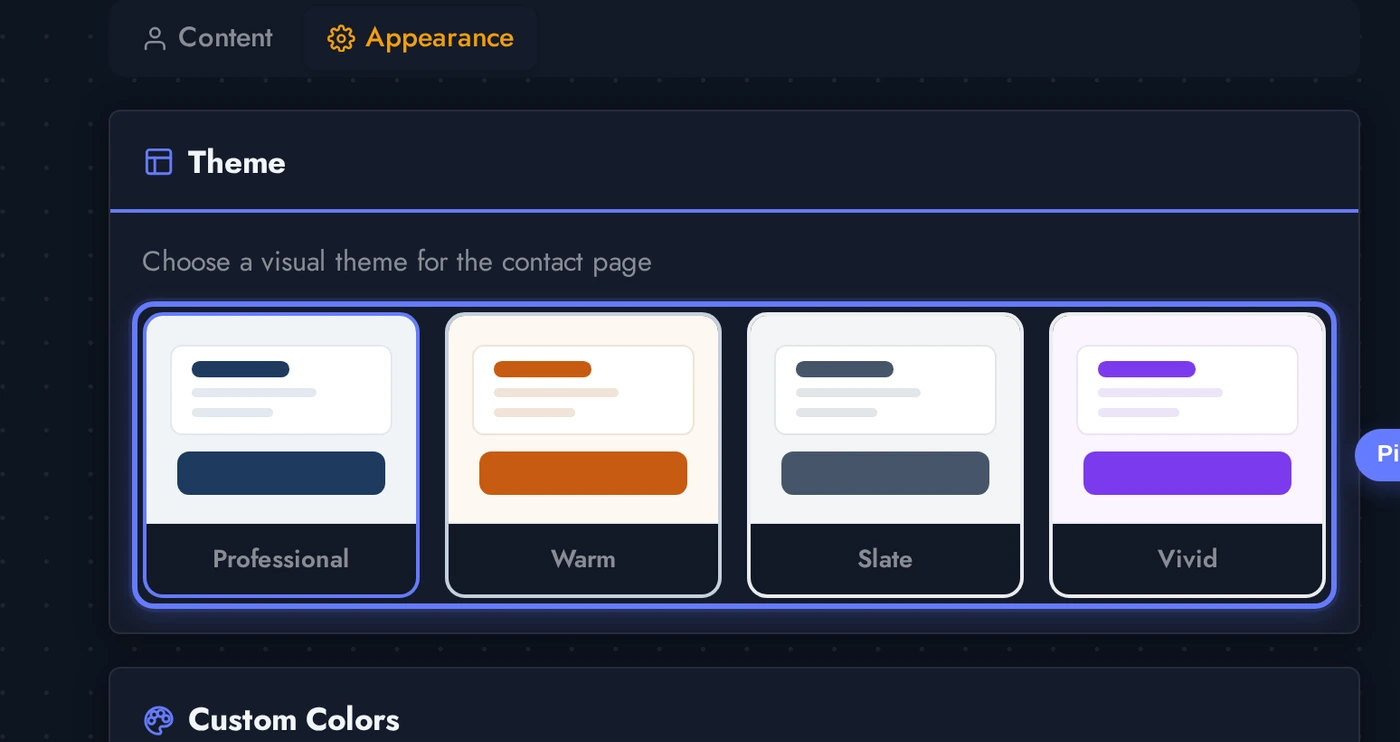
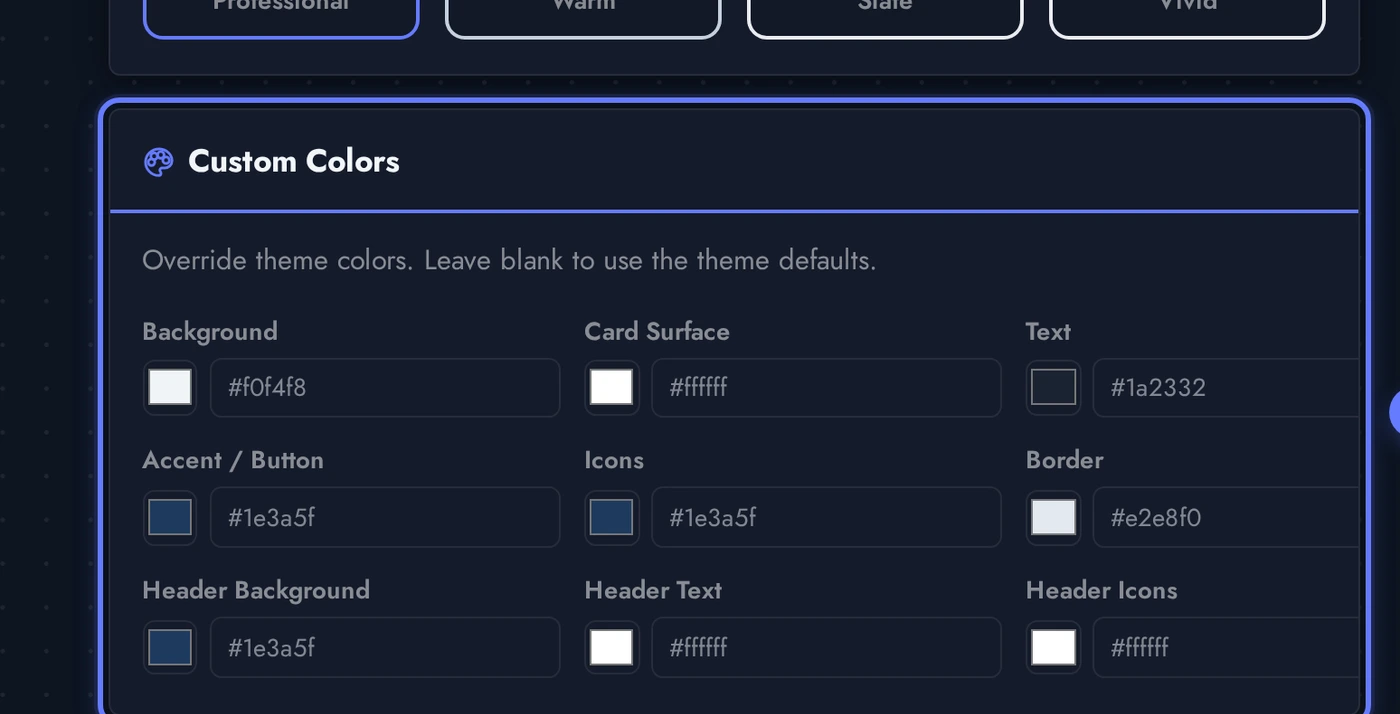
Below the theme grid, the Custom Colors panel lets you override individual colors on top of the chosen theme. Useful when the customer's brand is close to the theme but not identical, set the accent and text colors to exact hex values and the rest of the theme stays consistent.
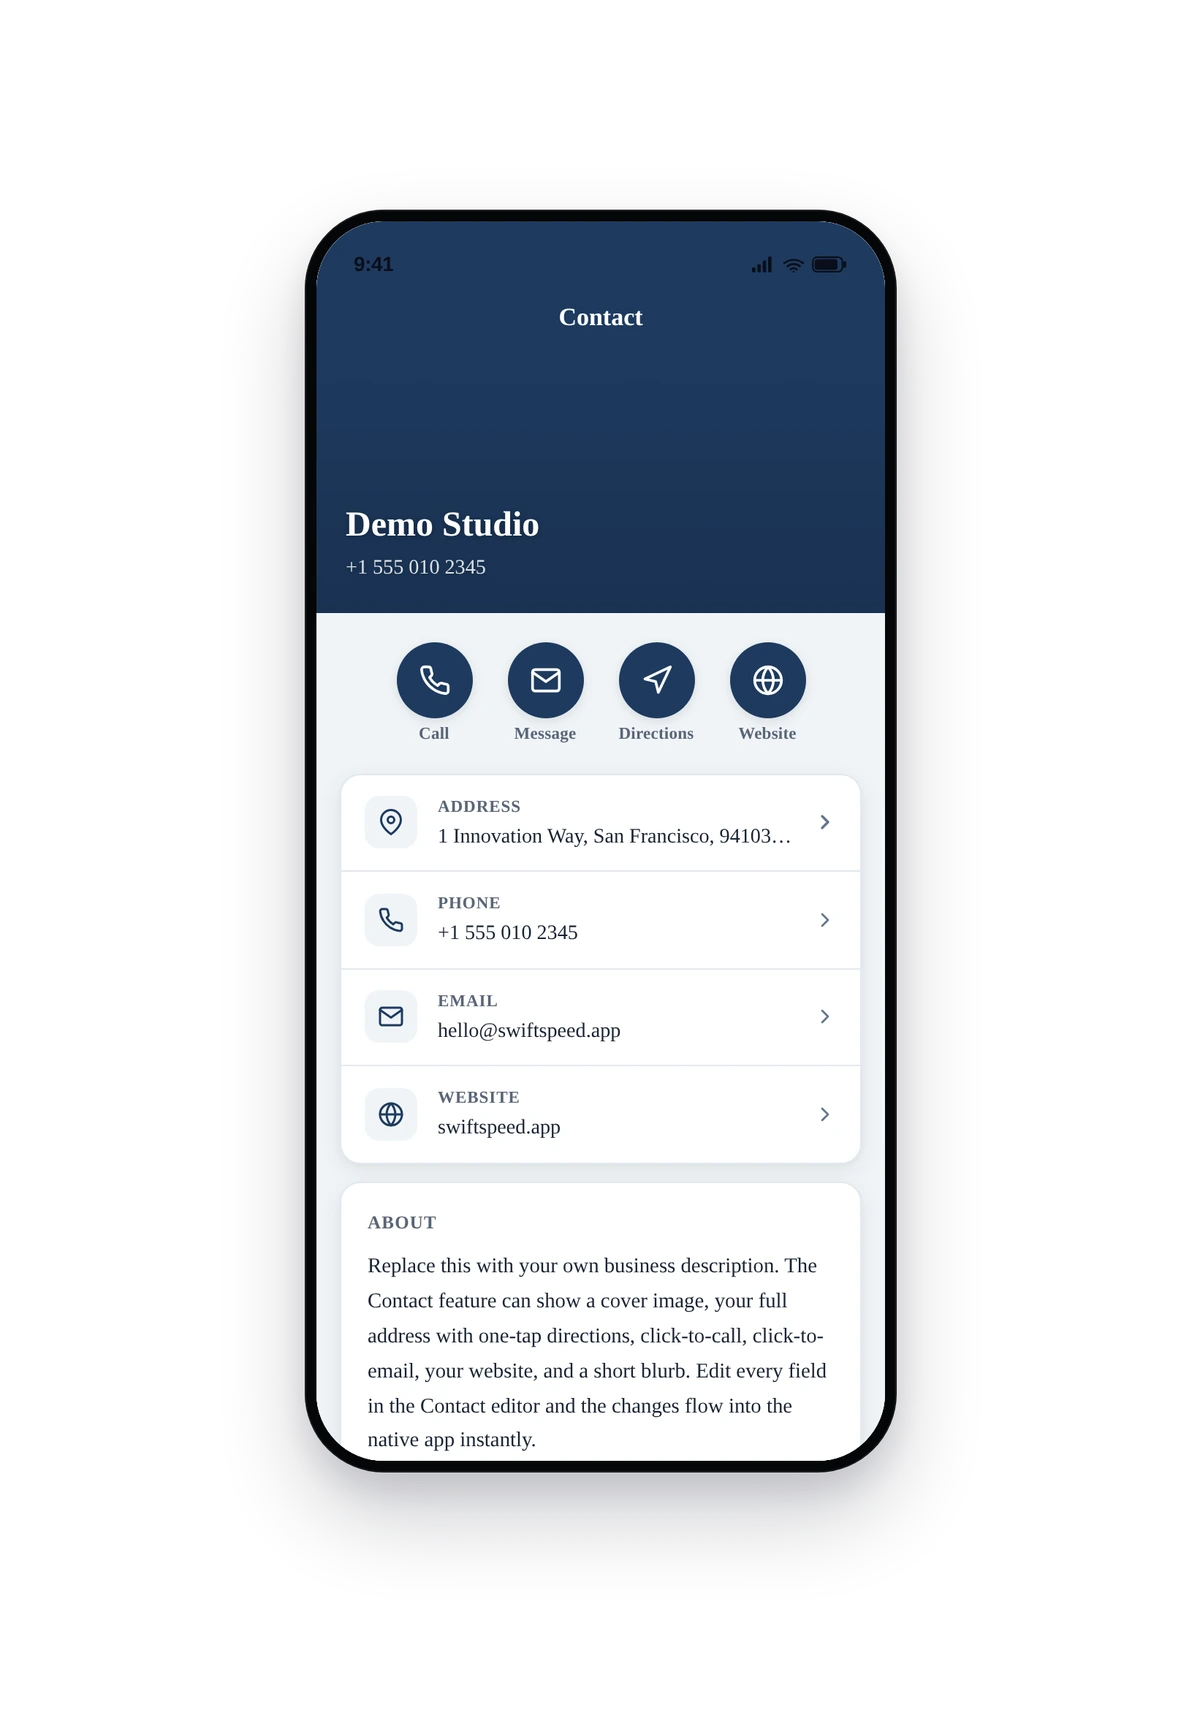
Live Preview of the Contact Page
Here is how the seeded Demo Studio info renders inside a real phone running the converted native contact page:
This is the actual native UI of the contact page, not a mockup. Tap the phone number to open the dialer, tap the email to open the email composer, tap the website to open it in the in-app browser, tap Get Directions to launch the system maps app with the address pre-routed. Replace the seeded Demo Studio info with your real business details and ship to the App Store and Google Play.
Tips and Troubleshooting
- Use a real Google Maps short link. The native maps app handles short links (
https://maps.app.goo.gl/...) and full coordinate URLs (https://maps.google.com/?q=lat,lng) equally well. Avoidhttps://www.google.com/maps/place/...URLs with embedded encoded JSON, those work in browsers but break some older Android maps apps. - Phone numbers must include the country code.
555 010 2345opens the dialer with no calling prefix on iOS, which fails when the user is roaming. Use+1 555 010 2345(with the plus sign) so the dialer routes correctly internationally. - Description is plain text only. No markdown, no HTML, no line-break tricks. The native app treats the field as a single paragraph. If you want multiple paragraphs in the contact page, use Custom Pages instead.
- Cover image: 16:9 looks best. Square covers work but feel tight on phones. A 1200x675 cover renders edge-to-edge in the contact page header on every modern phone size.
- The Show directions toggle is per-feature. Online-only businesses (no walk-in traffic) should turn it off so the native page doesn't advertise a button that opens an irrelevant location.
- Theme + Custom Colors compound. The theme picks the overall palette, the Custom Colors panel overrides individual entries on top of that. Set just the accent color if you only need to match a specific brand colour, leave the rest of the theme untouched.
- One contact feature per app is the norm. Nothing stops you from adding multiple Contact pages (e.g. one per branch), but most apps keep one global contact page and use Custom Pages for branch-specific info.